Performing IP configuration in Windows Vista is almost the same as how you perfrom an IP configuration in Windows XP. It's just that, the way how to access the Command prompt is a little bit different though much easier.
HOW TO PERFORM AN IP CONFIGURATION IN WINDOWS VISTA
►Click the Windows Vista Orb ( or simply the round button in the lower left corner of your window)
►Now, there are 3 ways how to access the command prompt from the start menu ◘ By typing "CMD" or "Command" in the "Start Seach" field box at the bottom part of the menu
◘ By clicking "All Programs", then select "Accessories", then choose "Command Prompt" from the accessories option panel
◘ There's also a "command prompt" icon on the start menu. just click it and you will be directed to the Command prompt window
►The Command Prompt window will appear or in layman's term, they called it the "black Window or black box"
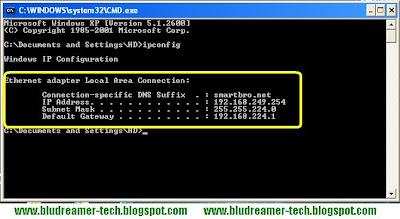
 ►Now right where the cursor is blinking, just type "ipconfig"
 ► Then after a few seconds, the command prompt will response and it will provide you the "Ethernet adapter Local Area Connection" info which includes the IPv6 address, Subnet Mask and the Default Gateway.
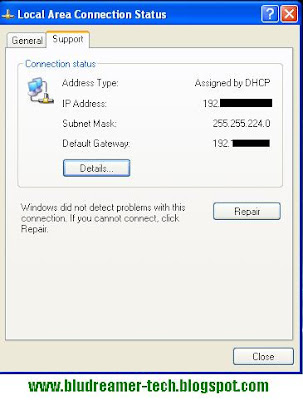
♫ You can also go to the control panel and choose the "Local Area Network Connection" icon. Right click the icon and select "Status" from the option. The "Local Area Connection Status" box will appear. Just click the "Support" tab and it will then provide you the IP information
HOW TO PERFORM AN IP CONFIGURATION IN WINDOWS VISTA
►Click the Windows Vista Orb ( or simply the round button in the lower left corner of your window)
►Now, there are 3 ways how to access the command prompt from the start menu
 ◘ By typing "CMD" or "Command" in the "Start Seach" field box at the bottom part of the menu
◘ By clicking "All Programs", then select "Accessories", then choose "Command Prompt" from the accessories option panel
◘ There's also a "command prompt" icon on the start menu. just click it and you will be directed to the Command prompt window
►The Command Prompt window will appear or in layman's term, they called it the "black Window or black box"
 ►Now right where the cursor is blinking, just type "ipconfig"
 ► Then after a few seconds, the command prompt will response and it will provide you the "Ethernet adapter Local Area Connection" info which includes the IPv6 address, Subnet Mask and the Default Gateway.
♫ You can also go to the control panel and choose the "Local Area Network Connection" icon. Right click the icon and select "Status" from the option. The "Local Area Connection Status" box will appear. Just click the "Support" tab and it will then provide you the IP information


 automatically to the modem's interface. There should be a section or button in that web page that says "Login". After clicking the Login button, it will then take you to the Authentication page where it will require you to enter your username and password. If the username and password fill box are blank, simply enter the necessary information then hit "connect". If there's something written in both fill box and there's a "disconnect" button below, then hit the "disconnect" button, then it will now allow you to edit those information to your newly updated username and password, then hit connect. The internet light must turn from Red to a solid Green Light. ( i will discuss this in much detailed information soon)

